Using Key Points in Node-REDRequires Pro
Use Key Points, groups, families, progress, and timing windows in Node-RED automations.
Key Points
Time-line Live listens to the active track and segments it into musical sections, Key Points, in real-time as the DJ performs: Drive, Build, Rhythmic Build, Pre-Drop, Fake Drop, Drop, Drop Break, Breakdown, Outro.

Key Points in a track
See Understanding Key Points for what each section means musically.
Key Points, Groups, and Families
When building an automation, you don't always want to react to every individual Key Point. Time-line lets you work at three levels:
- Key Point: a single musical section.
- Group: back-to-back Key Points of the same type, treated as one span. Example, two Rhythmic Build sections in a row is one group.
- Family: back-to-back Key Points of related types, treated as one span.
- Build: Build + Rhythmic Build
- Drive: Drive + Drive Break
- Drop: Drop + Drop Break
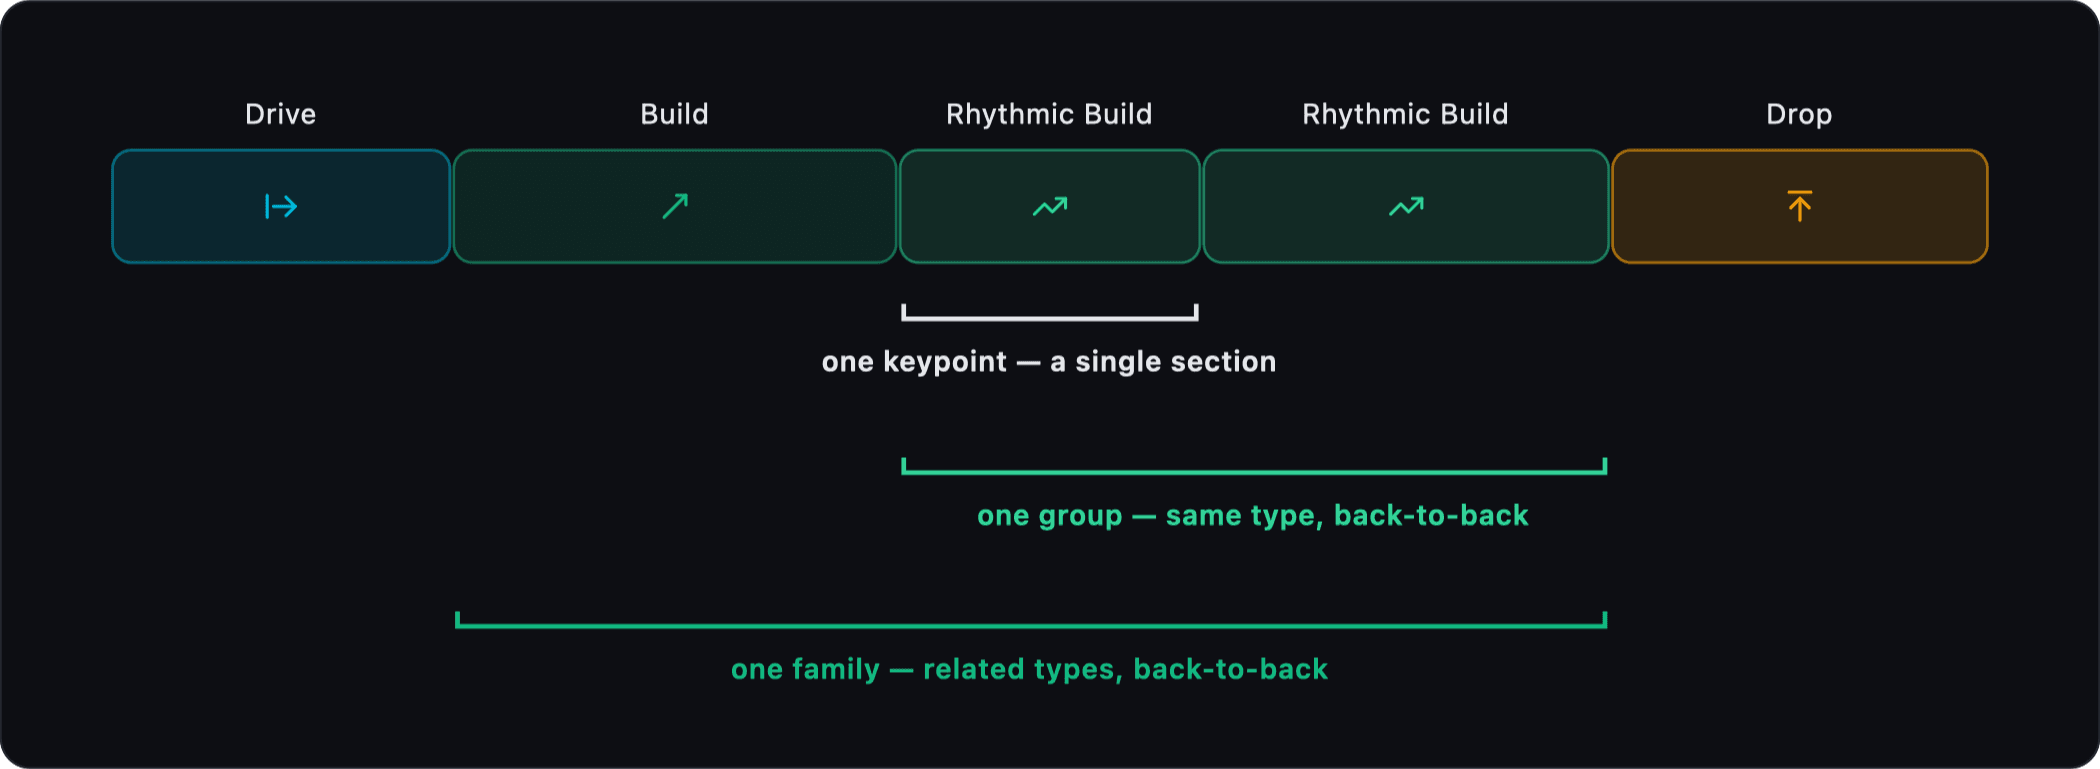
Key Point, Group, and Family levels
In Node-RED, you can work with individual Key Points, as well as their Groups and Families. As a reminder, each Key Point can output both Events (top connector) and a Stream (bottom):
- Event sends one message when the section starts and one when it ends.
- Stream sends around ~30 messages per second while the section is active, carrying live progress.
When to Use the Key Point, Group or Family
In the visual example above, the track moves through a Build → Rhythmic Build → Rhythmic Build → Drop. The Build and two Rhythmic Build sections together form one Build Family.
Let’s say you want your lighting to evolve throughout this sequence. You could use:
- Build Family → change the color when the entire Build sequence begins.
- Rhythmic Build Group → pulse the lights throughout both Rhythmic Build sections.
- Individual Rhythmic Build Key Point → increase the intensity when the final (2nd) Rhythmic Build begins.
- Drop Key Point → trigger the release.
You see how this system helps you create dynamic scenes that will always feel connected to the music. The Rhythmic Build Fader Ramp in the Node-RED example flows creates exactly this kind of ramp.
Progress
The Time-line Progress node in Node-RED lets you track how far you are through a Key Point, Group, or Family. It takes a Stream as input and outputs a value that changes as the music progresses.
For example, in our Build sequence:
- Key Point Progress resets for each individual Build or Rhythmic Build.
- Group Progress runs across both back-to-back Rhythmic Build sections.
- Family Progress runs across the entire Build Family, from the start of the Build until the Drop.
This makes it easy to create effects that evolve with the music. For example, gradually increasing brightness throughout an entire Build Family.
By default, Progress moves evenly from its minimum to maximum value. You can use the Curve to change how that value develops over time. For example, instead of increasing a lighting fader at a constant rate throughout a Build, you could keep the increase subtle at first and make it rise much faster as the Drop approaches.
Acting Before or After a Key Point (Pre/Post Windows)
By default, Progress runs from the beginning to the end of the selected Key Point, Group, or Family. Sometimes you may want it to start before that section begins or continue after it ends.
The Window setting inside the Progress node lets you extend the Progress period before or after the selected section, in seconds or bars.
For example, ramp up during the 8 bars before the Drop arrives or continue an effect 3 seconds after a section ends.
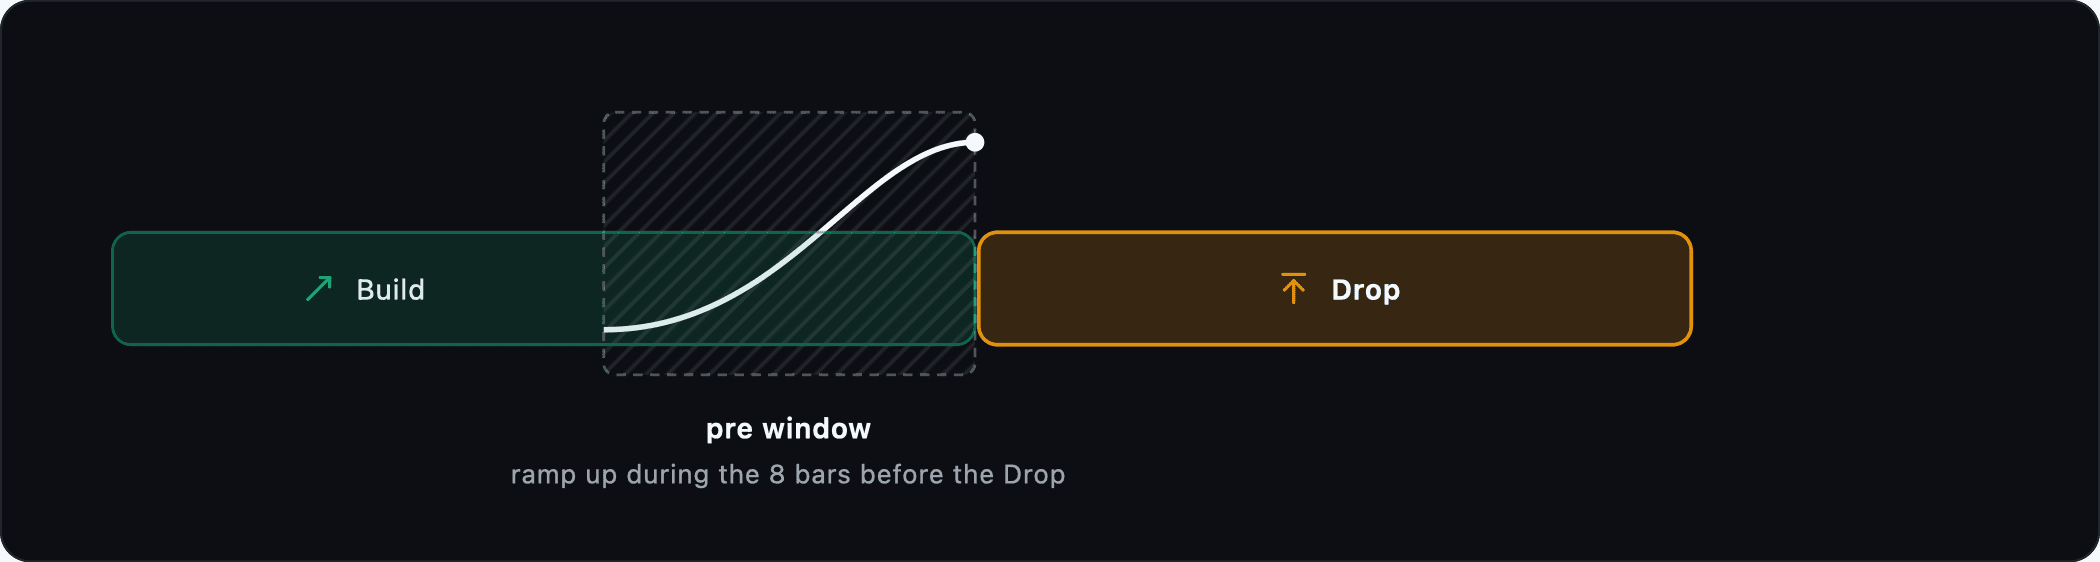
Pre window before the Drop
If you want to trigger a single action before or after a Key Point, use the Offset node instead. For example, you could fire a cue 4 bars before a Drop, or trigger an effect slightly early to compensate for system latency. Unlike a Progress Window, which creates a continuous progression over time, Offset fires a single event at the specified moment.
How is this guide?
Last updated on